
This post may contain affiliate links. For more details, please see our Affiliate Disclosure .
There is a specific kind of nostalgia wrapped up in the scent of fresh strawberries and cream. It takes me right back to childhood summers, sitting on a porch swing with a cone that was inevitably melting faster than I could eat it. But as a mom and someone deeply invested in wellness research, I’ve found that the sugary syrups of traditional ice cream shops often leave me feeling sluggish rather than satisfied.
I spent a long time looking for a way to recreate that lush, velvety texture without the heavy sugar load. That’s when the Ninja Creami completely changed my kitchen routine. Unlike traditional churners, it has this incredible ability to transform solid blocks of frozen ingredients into silk.
When I first tested this 3 ingredient Ninja Creami strawberry recipe, I was admittedly skeptical. Could just milk, fruit, and a natural sweetener really rival the scoop shop? The answer, I’m happy to report, is a resounding yes. It’s become a staple in my home—a way to say “yes” to dessert while staying true to our health goals.
Turning Simple Ingredients into Spectacular Flavor
The beauty of this recipe lies in its restraint. We aren’t hiding behind artificial flavorings or stabilizers. Instead, we are letting high-quality ingredients do the heavy lifting. I love using ultra-filtered milk for this base. Not only is it lactose-free, which is gentler on digestion for many, but the filtration process concentrates the protein. This helps create a structure that feels rich and indulgent on the palate.
If you have been hunting for a low carb strawberry ice cream that doesn’t taste “diet,” the secret is in the fruit itself. By blending whole, fresh strawberries directly into the milk, you capture the bright, tart essence of the berry that artificial extracts just can’t mimic. Sweetening with monk fruit keeps the profile light and avoids that cloying sugary aftertaste.
For those of you exploring other fruit-forward options that align with balanced blood sugar, you might enjoy exploring my collection of 10 Diabetic-Friendly Fruit Desserts, which focuses on natural sweetness.
Mastering the Spin for Perfect Texture
If you are new to this machine, learning how to make strawberry creami in ninja involves a slight shift in mindset. It’s not a blender; it’s a creamifier. This means the preparation happens well before you crave the treat. I usually prep my pints in the evening while cleaning up dinner, so they are ready to spin the next night.

One trick I’ve learned through trial and error is the importance of a level freeze. When you pour your strawberry milk mixture into the pint, make sure it sits flat in your freezer. If it freezes at an angle, the blade might struggle to process it evenly, leading to a wobblier machine. A flat surface ensures that the blade shaves through the ice crystals uniformly, giving you that soft-serve consistency we all chase.
A Spoonful of Balance
Navigating desserts when you are managing blood sugar can often feel restrictive, but it doesn’t have to be. This recipe is what I consider an easy diabetes friendly ninja creami dessert because it focuses on what you can have, rather than what you can’t. By swapping cane sugar for a non-glycemic sweetener and using protein-rich milk, the macronutrient profile is much gentler on your system compared to store-bought brands.
I personally find that this treat satisfies my sweet tooth without triggering the energy crash that usually follows a high-carb dessert. It keeps me feeling steady and happy. However, nutrition is personal. I always recommend pairing a sweet treat—even a low-carb one—with a little extra fiber or fat, like a sprinkle of chopped walnuts, to further support a slow and steady digestion process.
A Note on Safety: These are general nutritional suggestions based on my experience and research, not medical advice. Consult your doctor or a registered dietitian before making dietary changes, especially if you have diabetes.
My Kitchen Secrets for the Creamiest Scoop
Even with the best recipes, the Ninja Creami can sometimes be temperamental depending on your freezer’s temperature. Here are a few “Kristina-approved” tweaks to ensure success every time:
- The Counter Thaw: I always let my frozen pint sit on the counter for about 10 to 15 minutes before spinning. This softens the outer ice crystals just enough to prevent that crumbly, powdery texture that sometimes happens on the first spin.
- The Re-Spin Rule: If you open the lid and it looks like pink snow, don’t panic! This is normal for lower-fat mixtures. Add a splash of milk and hit “Re-Spin.” It magically transforms into a creamy delight.
- Flavor Amplification: If your strawberries are out of season and tasting a bit flat, a tiny pinch of salt or a squeeze of lemon juice in the base can wake up the flavors instantly.

Creating desserts that support your wellness journey shouldn’t feel like a chore. Whether you are making this for a warm afternoon snack or a post-dinner treat, I hope this simple recipe brings a little bit of joy to your table. If you are looking for more ideas on maintaining satiety while enjoying sweets, check out my guide on 8 High-Protein Diabetic Desserts to Keep You Feeling Full and Satisfied.
Print
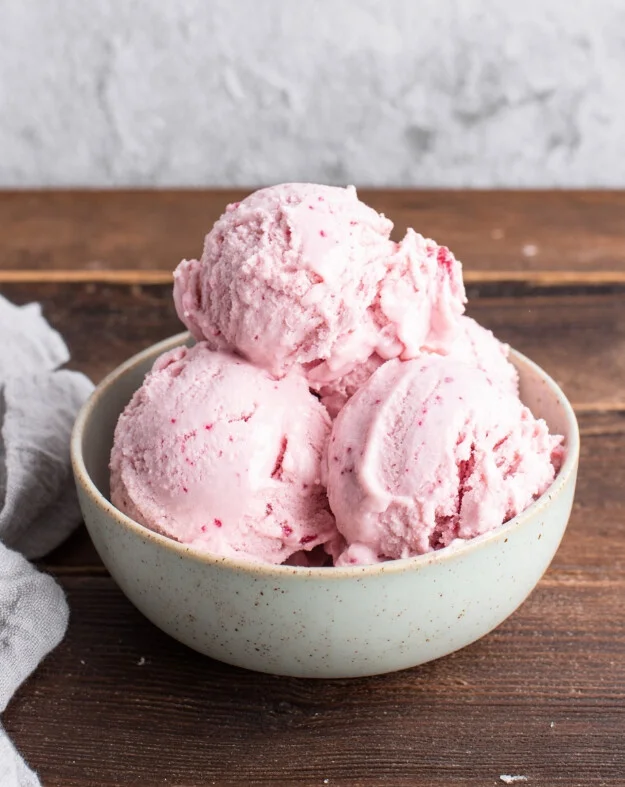
Velvety 3-Ingredient Strawberry Creami
- Prep Time: 5 minutes
- Cook Time: 5 minutes
- Total Time: 24 hours 10 minutes
- Yield: 3 servings (approx. 1 pint total; slight leftover amount may vary based on aeration) 1x
- Category: Dessert
- Method: Blending / Freezing
- Cuisine: American
Description
This ultra-simple, home-style frozen treat transforms just three humble ingredients into a luxurious dessert that rivals your local scoop shop. By using ultra-filtered milk and natural sweeteners, we keep the texture rich and creamy while staying perfectly diabetes-friendly and avoiding sharp energy spikes. It’s a guilt-free indulgence my family loves on warm afternoons!
Ingredients
- 1 cup Ultra-filtered whole milk (like Fairlife; reduced volume ensures the pint doesn’t overflow)
- 2 ½ tablespoons Granulated monk fruit sweetener (adjust slightly if berries are very tart)
- 1 heaping cup Fresh strawberries (washed, hulled, and halved; ensures a vibrant natural flavor)
Instructions
- Prepare the Base: In a high-speed blender, combine the fresh strawberries, monk fruit sweetener, and ultra-filtered milk. Blend on high until the mixture is completely smooth, frothy, and uniform in pink color.
- Freeze: Pour the blended strawberry liquid into your Ninja Creami pint container. With these adjusted quantities, the liquid should sit safely below the “Max Fill” line to allow for expansion. Secure the storage lid and place it on a level surface in your freezer for 24 hours to freeze solid.
- Spin: Remove the pint from the freezer and take off the lid. Place the pint into the outer bowl, insert the paddle into the outer lid, and lock the assembly into place on the machine base.
- Process: Select the “Lite Ice Cream” function (or “Ice Cream” depending on your model) and allow the cycle to run completely.
- Perfect the Texture: If the mixture appears crumbly or powdery after the first spin (common with lower-fat bases), simply create a small well in the center, add a tablespoon of milk (fresh from the fridge), and select the “Re-Spin” button. Repeat if necessary until the texture is silky smooth.
- Serve: Scoop immediately into bowls and enjoy this light, refreshing dessert.
Notes
- Wellness Balance Tip: This recipe is nearly ideal for diabetes management regarding carbohydrates, as the net carbs per serving (~5g) are well within the recommendations for a light snack, using a non-glycemic sweetener. However, because the percentage of calories from saturated fat is slightly higher relative to the total low calorie count, I recommend enjoying this as a planned daily treat. To optimize the nutritional balance, consider pairing your scoop with a small topping of walnuts or chia seeds—this adds healthy fiber to offset the fats and ensures a steady energy release.
- Allergy Alert: This recipe contains dairy (milk). For a dairy-free version, substitute with canned coconut milk, though this will alter the fat content and nutrition profile.
Personal Twist
- Temperature Tip: Let the frozen pint sit on the counter for about 10–15 minutes before spinning. This slight thaw softens the ice crystals, often resulting in a creamier texture without needing a re-spin.
- Flavor Pop: If your strawberries are out of season and lacking punch, add a tiny pinch of salt to the blender; it helps suppress bitterness and amplifies the fruit’s natural sweetness without adding sugar.
- Texture Hack: For a consistency closer to soft-serve frozen yogurt, run the “Re-Spin” cycle twice regardless of the initial texture—this incorporates more air for a fluffier mouthfeel.
Nutritional info (per ½ cup serving): Calories: 70 | Total Fat: 3g (Saturated: 1.5g) | Cholesterol: 10mg | Sodium: 40mg | Total Carbs: 6g (Fiber: 1g, Sugars: 4g) | Net Carbs: 5g | Protein: 5g
These are approximate estimates based on standard nutritional data using Fairlife Whole Milk. Values may vary based on brands, exact measurements, and specific ingredients. For precise calculations, use a nutrition tracking app like MyFitnessPal or consult a reliable database.
Final Thought
There is a unique satisfaction in making your own ice cream. You know exactly what went into it, and you can taste the freshness in every bite. I’d love to hear how your batch turns out—did you add any toppings? Let me know in the comments!

Kristina Hanson is an independent wellness researcher and the founder of DailyZests. After a PCOS diagnosis, she focused her research on managing insulin resistance through evidence-based nutrition. Her work translates the science of DASH, Mediterranean, and Low-Carb eating into easy, family-tested recipes.

